Here are your tools: a container of water, a pile of newspaper, scissors (that you don't mind ruining), masking tape, plaster tape (I got mine from NASCO), a towel (that you don't mind ruining) for wiping your hands.
Cover your working space! This can get messy!
1.) Mash up the newspaper in the shape and size of your head. Tape the newspaper so it stays in the shape you want. You can measure your head if you want, but we just hold the lump up and ask, "Is this a good size for my head?"
2.) With more newspaper and tape, add the appendages of your choice - a big nose, horns, ears, warts, a beard.
3.) Cut the plaster tape into strips. I like them about 5" long and 3" wide, but it all depends on your mask.
4.) Dip the strips into water. Dip, don't soak. And immediately lay the strip over your newspaper shape. Smooth it a bit with your fingers. The plaster will fill in the gaps in the fabric mesh of the tape.
5.) FACE - Continue dipping, laying, smoothing the strips, criss-crossing them to add strength. Three layers of strips minimum. It dries stronger than you expect. Smooth it as much as you want. Cover the face of the mask, front only.
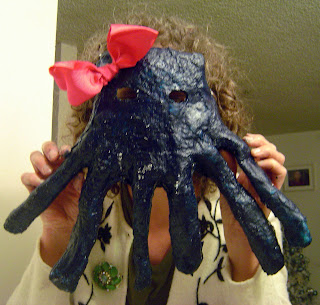
6.) EARS, HORNS, ETC - If you have small appendages - like the octopus legs, (don't worry, we know it only has 6 legs) - wrap the strips all the way around, front and back of the leg/horn/etc. Add a bit extra at the places where they connect to the face.
7.) Let it dry overnight.
(Don't throw the used water down the sink. Plaster is nasty in the drain. And don't wash the towel you've been wiping your hands on. Again, plaster is nasty in the drain.)
8.) When it's dry, pull out the newspaper. If it doesn't want to come out of the horns, let it stay. If there are any weak spots, you can add a few more strips of plaster tape.
DON'T FORGET TO COVER YOUR WORKSPACE!
 |
| That's better. |
9.) Hold it up to your face; mark some eye holes. Take it away from your face; cut the eye holes with an X-acto knife.
10.) Decorate! Paint, markers, collage, feathers, beads, ribbon . . . . It's lightweight and sturdy and the possibilities for plaster tape go way beyond mask making.
My CoachArt students' finished masks.
Please Note: These masks are primarily for fun and decoration. If you want to wear your mask, I recommend careful brushing and cleaning to remove any bits of plaster dust (especially around eyes) and then lining the inside with felt.


2 comments:
I love this project! I'm thinking those scary Mexican wrestling masks in vivid colors. Have you seen those, Jeanie? It's called la luca I think. Great site! Thanks again for adding so much fun and energy to the storytelling event!
I know exactly what you mean with the Mexican wrestling masks! And thank YOU for putting together such a fun event at the Long Beach Playhouse! So glad I could be a part of it.
Post a Comment